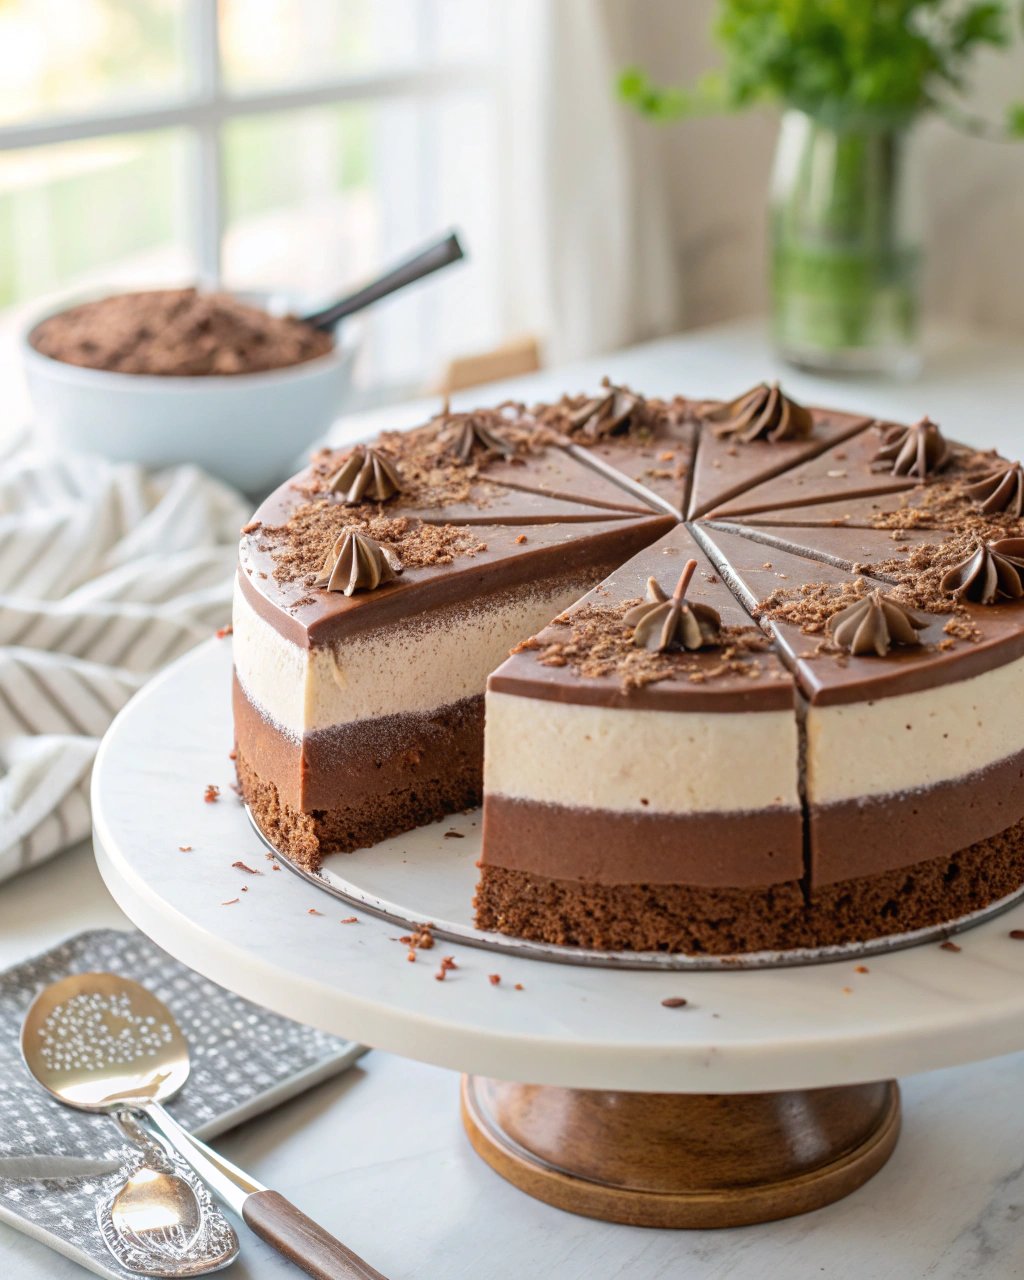
Okay, so listen up. This triple chocolate mousse cake? It’s not just a dessert, it’s an *event*. Seriously. I remember the first time I made this, years ago now, for my sister’s birthday. I was absolutely convinced it was going to be a total flop – all those layers, all that chilling time, felt way beyond my abilities. But you know what? It turned out bloody brilliant. Like, show-stopping brilliant. And honestly, once you get the hang of it, it’s actually not that scary. A bit of patience, a little faith, and you too can churn out something that looks like it came form a fancy patisserie but tastes like pure, homemade love. It’s rich, it’s smooth, it’s got three distinct chocolatey personalities all playing together nicely. Trust me, make this once and it’ll be your signature dish.
So, why make this cake?
Right, why *wouldn’t* you? I make this when I want to seriously impress people without actually having to do a gazillion fiddly steps. It’s perfect for celebrations, birthdays, Christmas (it’s gorgeous with a festive sprinkle!), or honestly, just because you really, really deserve some amazing chocolate cake. My family goes absolutely crazy for this because, well, layers of mousse! Three kinds! It’s just pure indulgence.
And let’s be real, sometimes baking can be frustrating, right? Like when things don’t set properly? Ugh. But this recipe, provided you follow the chilling times (seriously, don’t skimp!), is pretty foolproof. It’s layers of smooth, airy mousse over a simple base. Dreamy.
Okay, what you’ll need:
Here’s the bits and bobs you’ll need. Don’t worry if you don’t have exactly the right brand or whatever, most things are pretty flexible.
- **For the base:**
- 200g digestive biscuits (or graham crackers if you’re across the pond, Oreos work too for a darker base!)
- 100g unsalted butter, melted
- **For the chocolate mousses:**
- 150g good quality dark chocolate (around 70% cocoa is my fave, but whatever you like is fine), chopped
- 150g milk chocolate, chopped
- 150g white chocolate, chopped
- 600ml double cream (or heavy cream)
- 9g gelatin powder (that’s about 3 standard sachets), or equivalent sheets
- 6 tablespoons cold water (if using powder)
I sometimes use chocolate chips if that’s all I have, but proper bar chocolate melts smoother. My grandmother always insisted on Cadbury for the milk chocolate, but honestly any decent brand works fine.
Putting it all together: The How-To
Deep breath! It’s a process, but a fun one, I promise.
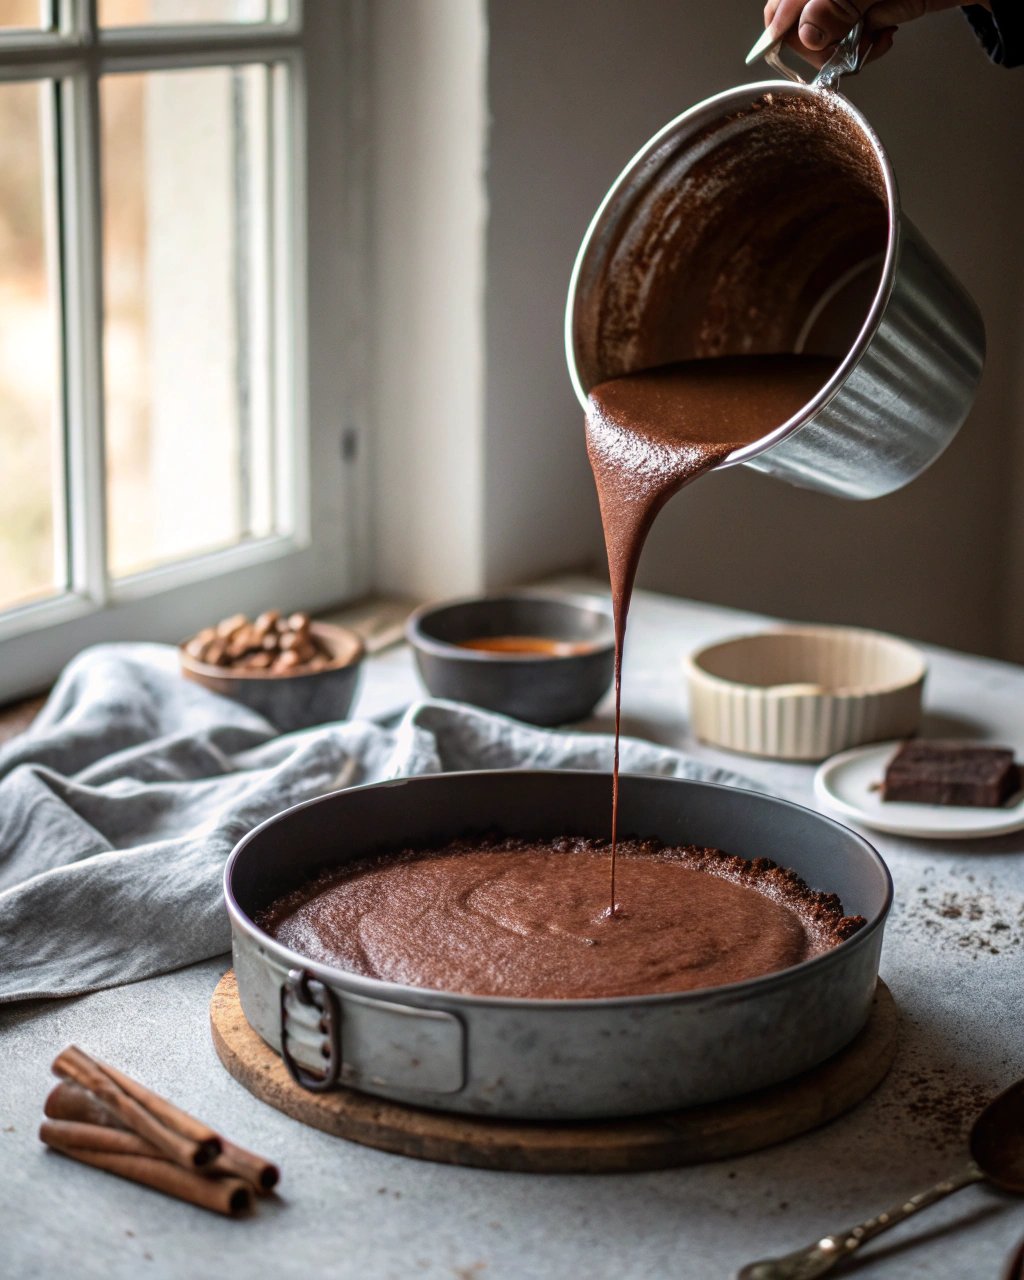
- **Base Layer:** Whizz up the biscuits in a food processor until they’re fine crumbs. No food processor? Pop them in a bag and bash ’em with a rolling pin. Pour the melted butter over the crumbs and mix until it looks like wet sand. Press this mixture firmly into the base of a 20-23cm springform pan. Really compact it down with the back of a spoon or the bottom of a glass. Stick it in the fridge for at least 30 minutes to set while you get the first mousse ready.
- **Gelatin Prep:** If using powder, sprinkle the gelatin over the cold water in a small bowl and let it sit for 5-10 minutes to ‘bloom’ (it’ll go a bit wobbly and thick). If using sheets, soak them in a bowl of cold water for the time recommended on the packet, then squeeze out the excess water.
- **Dark Chocolate Mousse:** Gently melt the dark chocolate. You can do this in a bowl over a pan of simmering water (don’t let the bowl touch the water!), or very carefully in the microwave in 30-second bursts, stirring between each. Let it cool *slightly* – you don’t want it hot, just melted.
- **Whip Cream:** While the chocolate cools, whip 200ml of the double cream until soft peaks form. You want it thick enough to hold its shape but still a bit floppy, not stiff like meringue.
- **Add Gelatin to Dark Choc:** If using bloomed powder gelatin, gently heat it for a few seconds until it melts into a liquid (microwave or over warm water). If using squeezed sheets, just stir them into the slightly warm melted chocolate – the heat will dissolve them. Stir the melted gelatin into the slightly cooled dark chocolate until completely combined and smooth.
- **Combine Dark Mousse:** Take a spoonful of the whipped cream and stir it *firmly* into the chocolate/gelatin mixture. This lightens it. Then, *gently* fold the rest of the whipped cream into the chocolate mixture using a spatula. Be careful not to knock all the air out! Just fold until no white streaks remain.
- **First Layer Down:** Pour the dark chocolate mousse over the chilled biscuit base in your springform pan. Smooth the top gently.
- **Chill Time 1:** Pop it back in the fridge for at least 1-2 hours, or until the dark layer is properly set and firm to the touch. This is where I usually sneak a little bite of the leftover mousse form the bowl (don’t tell anyone!).
- **Milk Chocolate Mousse:** Repeat steps 3-7 exactly, but using the milk chocolate, another 200ml of double cream, and another third of the gelatin (3g powder or 1 sheet). Pour the milk chocolate mousse over the set dark layer.
- **Chill Time 2:** Back in the fridge for another 1-2 hours until the milk layer is set. Patience, friend, patience!
- **White Chocolate Mousse:** You guessed it! Repeat steps 3-7 using the white chocolate, the final 200ml of double cream, and the last portion of gelatin. White chocolate can be a bit trickier to melt without seizing, so go extra slow and gentle. Pour over the set milk layer.
- **Final Chill:** This is the big one. Back in the fridge for at least 4-6 hours, or even better, overnight. It needs to be completely solid before you even *think* about releasing that springform side.
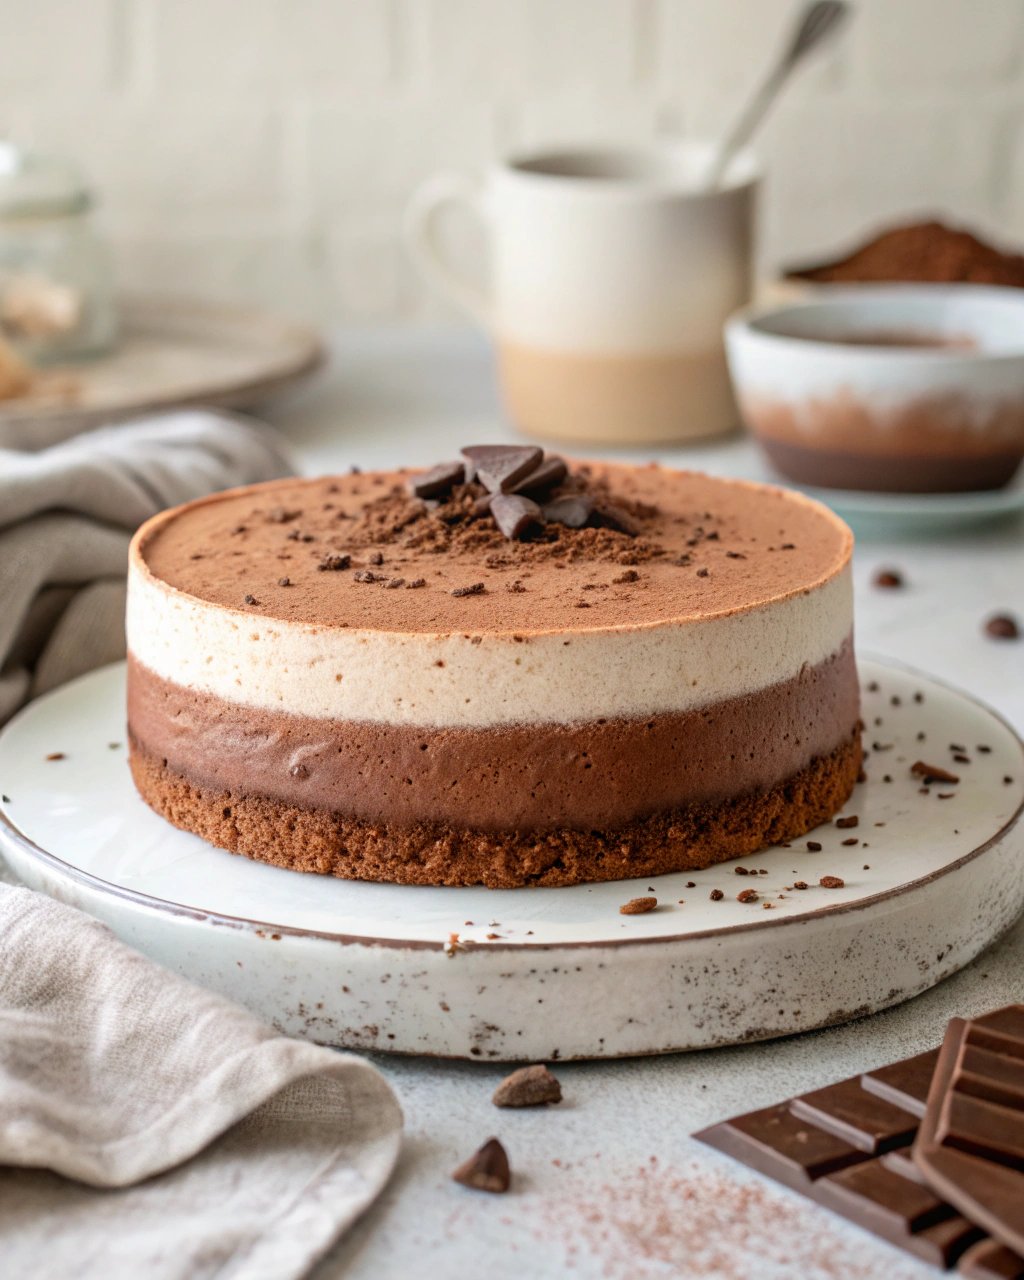
To serve, gently unclip the springform pan side. Sometimes warming the side slightly with a warm cloth helps release it cleanly. Be brave!
Notes from my kitchen trials:
- Don’t rush the chilling! Seriously. A wobbly layer is a sad layer.
- Make sure your melted chocolate isn’t hot when you fold in the cream, or you’ll melt your lovely whipped cream.
- Gelatin must be dissolved completely before adding to the chocolate, little grainy bits are… unpleasant.
- Whipping the cream just right is key – too soft and the mousse won’t set firm, too stiff and it’ll be heavy, not airy. Soft peaks are your friend here.
Variations I’ve tried (and one oopsie!)
You can totally play around with the base – swap digestives for Oreos, Hobnobs, or even make a thin sponge cake layer instead. I once tried adding a layer of fresh berries in the middle, thinking it’d be lovely and fruity, but honestly, the moisture made one of the mousse layers a bit weird and less set. So, I stick to serving berries *on top* now!
Equipment you’ll need
A **springform cake pan** (20-23cm) is pretty essential for getting those clean sides. Though, actually, I find it works better if you line a regular cake pan *really* well with parchment paper criss-crossing, leaving plenty of overhang to lift it out later if you don’t have a springform! You’ll also need mixing bowls, a whisk (hand or electric), something to melt chocolate (double boiler setup or microwave), and a spatula for folding.
Storage
Keep this lovely cake in the fridge. Loosely cover it once cut. Though honestly, in my house it never lasts more than a day or two anyway!
Serving Suggestions
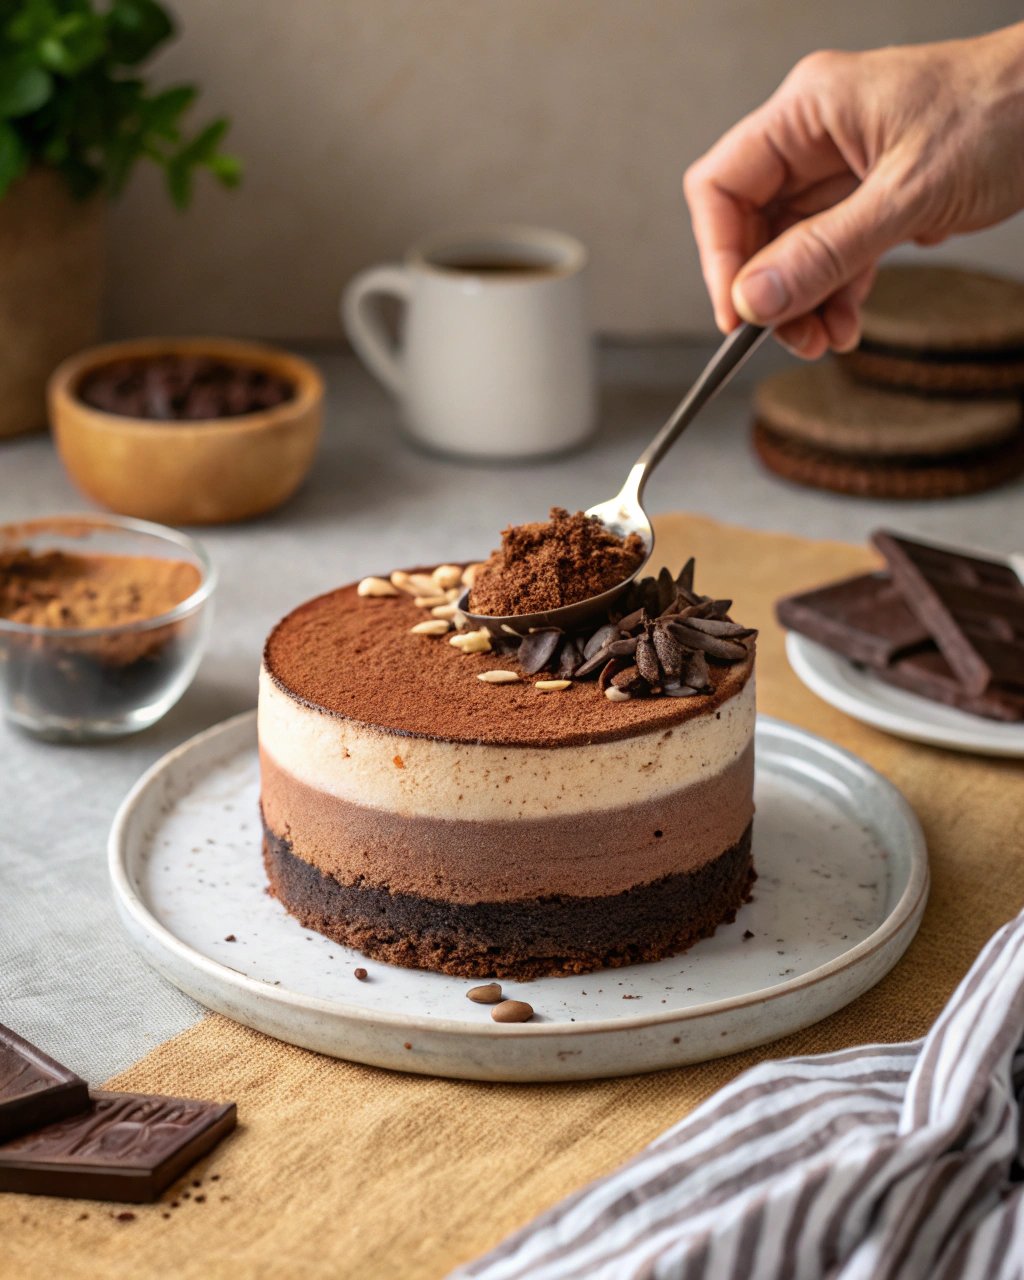
I think this tastes better the next day, letting the flavours meld. Dust the top with a little cocoa powder, some chocolate shavings, or fresh raspberries or strawberries look stunning against the dark chocolate top. Sometimes I melt a bit more chocolate and drizzle it over just before serving. Fancy!

Pro Tips (Learn from my mistakes!)
Okay, the big one: **Gelatin**. Follow the instructions on the packet *exactly* for blooming/dissolving. I once tried rushing this step and just whisked the powder straight into warm chocolate hoping for the best… it resulted in a rather sad, unset, slightly grainy layer. Learn form my pain! Also, don’t overmix the mousse once you’ve folded in the cream; you lose the air, and that’s what makes it lovely and light.
FAQ – Things people ask me
Can I use chocolate chips instead of bars?
Yeah, you can, but bar chocolate melts smoother and gives a better texture. If you use chips, make sure they’re good quality and melt them *really* gently.
My mousse looks too thin after folding – help!
Did you whip your cream enough (soft peaks!)? Was your chocolate too hot? Did you add the gelatin properly? Pop it in the fridge for a bit and see if it firms up before adding the next layer. If it’s really liquid… well, you might have to troubleshoot the gelatin step. It happens!
How long *does* it really need to chill?
At least 1-2 hours per layer, and 4-6 hours minimum for the final set. Overnight is best. Seriously. Don’t be tempted to unmould it too soon! It needs that time to become sliceable magic.
Can I freeze this cake?
You can! Mousse cakes generally freeze quite well. Wrap it really well in plastic wrap and then foil, then freeze for up to a month. Thaw it overnight in the fridge before serving. The texture might be slightly different, but it’s still darn good.
There you have it. My guide to a truly sensational triple chocolate mousse cake. Give it a go, and prepare for the compliments!